这次来折腾七牛云的 https,利用 let's encrypt 免费的服务可方便在七牛云上开启 https 服务。
七牛云免费证书
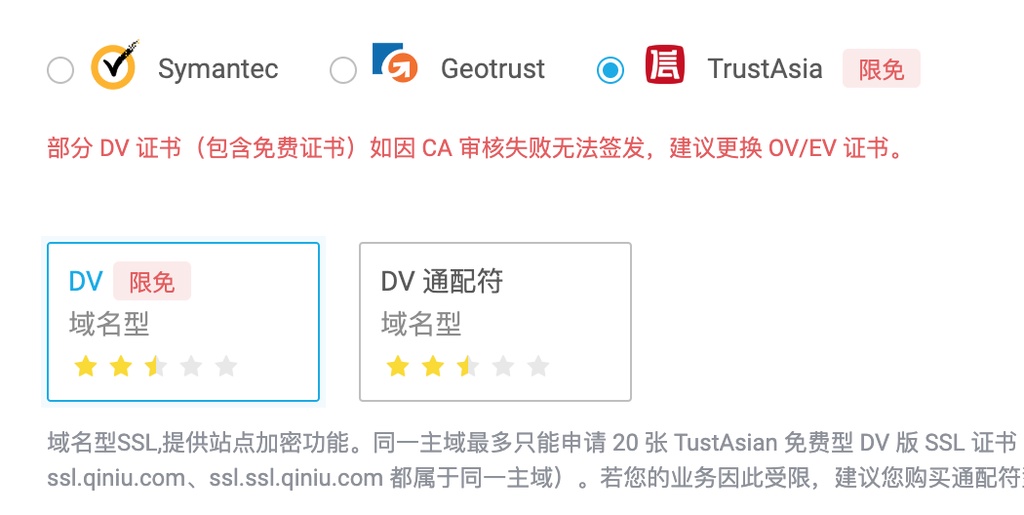
七牛云后台有提供免费的单域名证书,TrustAsia限免

这个提交很方便,但只对公司服务,对个人不友好。幸好还提供 上传自有证书的服务,使用这个服务可以自己弄到证书后往里填,比在自己的服务器里麻烦,总比没有的好。
let's encrypt 证书
这里使用的工具是 acme.sh,这是用纯脚本写的工具,在Unix系统下都可顺利安装运行。
安装 acme.sh
一行命令安装
1curl https://get.acme.sh | sh
但你可能在安装时遇到下面的出错提示:
1Failed to connect to raw.githubusercontent.com port 443: Connection refused
简单的解决方法是换个国外的VPS上运行
如果安装成功则会出现下面提示:
1
2
3
4
5
6
7
8
9
10
11
12
13
14
15
16
[Sat 15 Feb 2020 09:53:15 AM UTC] Installing from online archive.
[Sat 15 Feb 2020 09:53:15 AM UTC] Downloading https://github.com/acmesh-official/acme.sh/archive/master.tar.gz
[Sat 15 Feb 2020 09:53:16 AM UTC] Extracting master.tar.gz
[Sat 15 Feb 2020 09:53:16 AM UTC] It is recommended to install socat first.
[Sat 15 Feb 2020 09:53:16 AM UTC] We use socat for standalone server if you use standalone mode.
[Sat 15 Feb 2020 09:53:16 AM UTC] If you don't use standalone mode, just ignore this warning.
[Sat 15 Feb 2020 09:53:16 AM UTC] Installing to /root/.acme.sh
[Sat 15 Feb 2020 09:53:16 AM UTC] Installed to /root/.acme.sh/acme.sh
[Sat 15 Feb 2020 09:53:16 AM UTC] Installing alias to '/root/.bashrc'
[Sat 15 Feb 2020 09:53:16 AM UTC] OK, Close and reopen your terminal to start using acme.sh
[Sat 15 Feb 2020 09:53:16 AM UTC] Installing cron job
no crontab for root
no crontab for root
[Sat 15 Feb 2020 09:53:16 AM UTC] Good, bash is found, so change the shebang to use bash as preferred.
[Sat 15 Feb 2020 09:53:17 AM UTC] OK
[Sat 15 Feb 2020 09:53:17 AM UTC] Install success!
程序会安装在当前用户的 home 目录下
1
2
3
4
5
6
7
8
$ cd ~/.acme.sh/
$ ls -l
-rw-r--r-- 1 root root    152 Feb 15 09:53 account.conf
-rwxr-xr-x 1 root root 196314 Feb 15 09:53 acme.sh
-rw-r--r-- 1 root root     78 Feb 15 09:53 acme.sh.env
drwxr-xr-x 2 root root   4096 Feb 15 09:53 deploy
drwxr-xr-x 2 root root   4096 Feb 15 09:53 dnsapi
drwxr-xr-x 2 root root   4096 Feb 15 09:53 notify
验证域名所有权
acme.sh 实现了 acme 协议支持的所有验证协议。 一般有两种方式验证: http 和 dns 验证。
由于域名已经cname给七牛了,这里要用 dns 方式验证,就是在域名解析了设置相关TXT记录……实际不用登录到后台那么干,大多数域名服务商会提供API key,直接用接口设置。
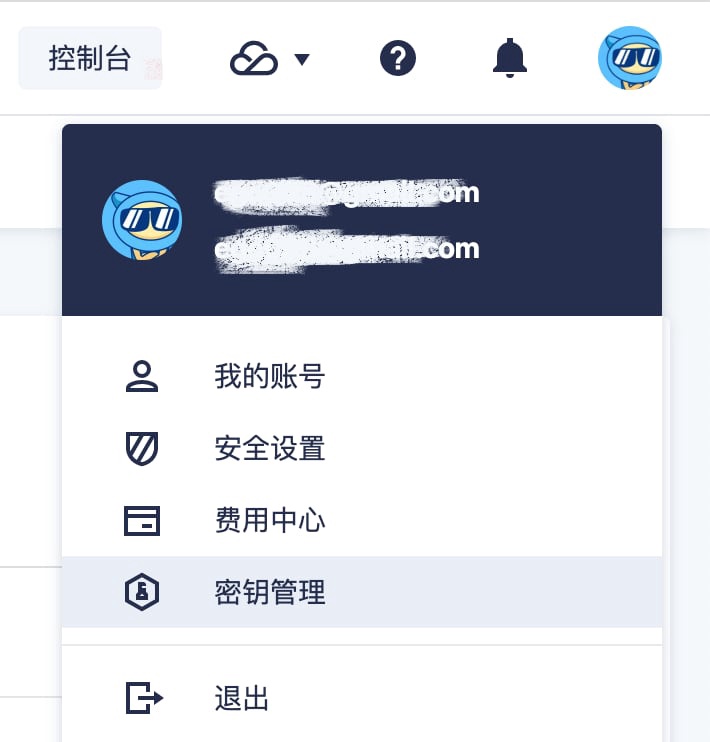
我这里以 dnspod.cn 为例,登录后点右上角自己头像,点密钥管理

就弹出窗口,看到 id 和 Token ,应立刻记下来,放在其它地方,等会使用。
实行命令添加id 和 Token:
1
2
export DP_Id="138xxx"
export DP_Key="7a94xxxxxxxxe78b43f99xxx"
生成证书
再来一条命令搞定:
1./acme.sh --issue --dns dns_dp -d example.com -d www.example.com
上面是给example.com 和 www.example.com 两个域名申请证书,根据自己的情况增减。
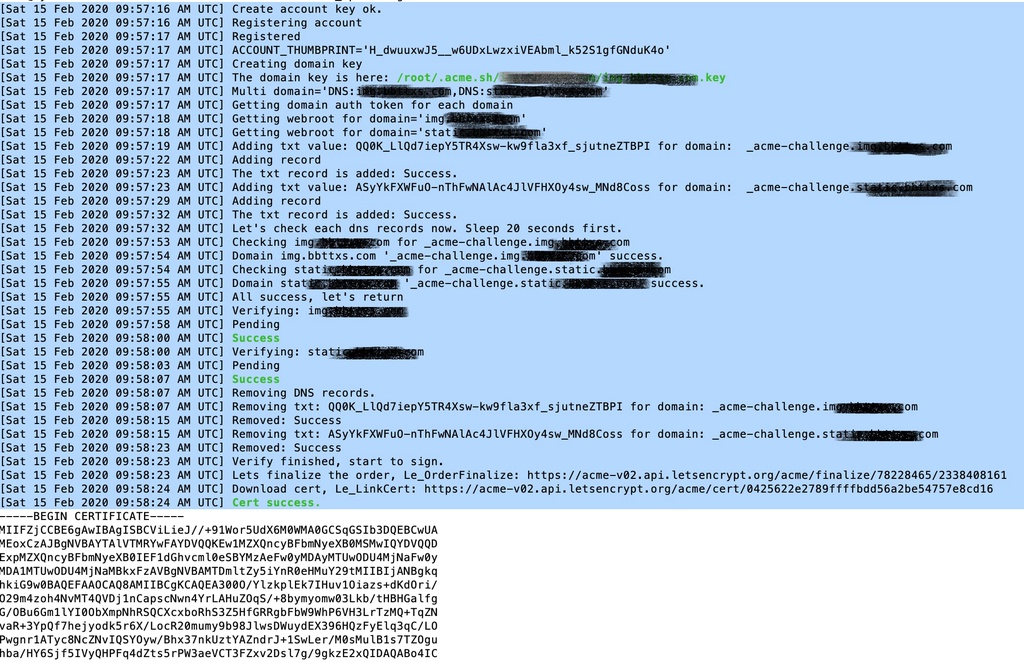
如果正常则会看到下面提示

重要的是最后几行:
1
2
3
4
Your cert is in  /root/.acme.sh/img.example.com/img.example.com.cer
Your cert key is in  /root/.acme.sh/img.example.com/img.example.com.key
The intermediate CA cert is in  /root/.acme.sh/img.example.com/ca.cer
And the full chain certs is there:  /root/.acme.sh/img.example.com/fullchain.cer
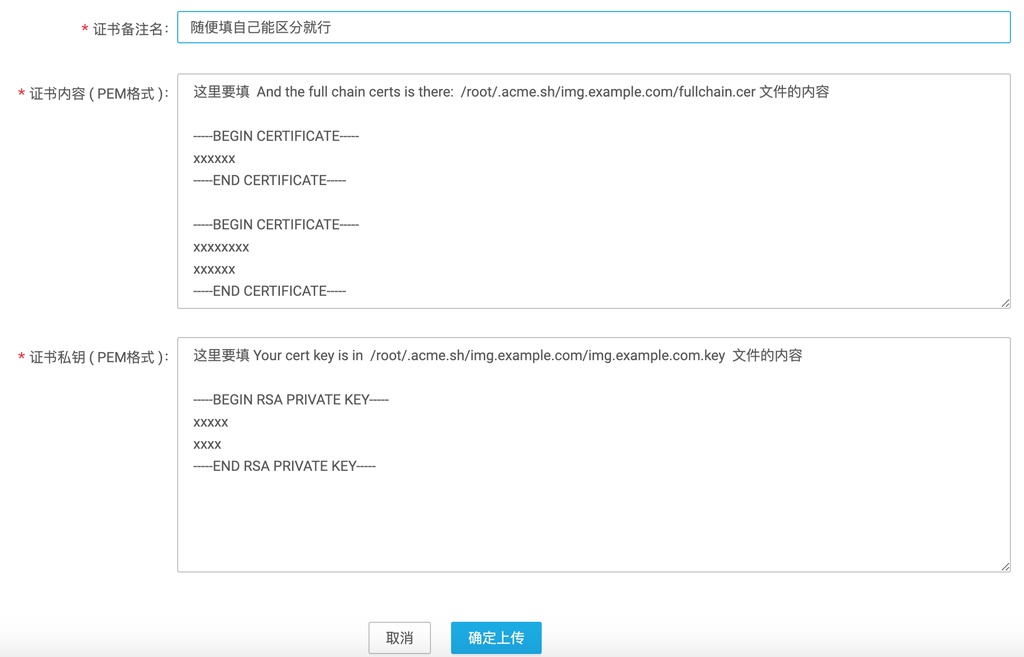
填写证书
把上面第4和第2个文件的内容分别填进七牛后台,参考下图

配置启用 https
最后是到 CDN / 域名管理 选择对应的域名配置

一般等待两三分钟后就可以用 https 访问
参考
- acme.sh中文说明 https://github.com/acmesh-official/acme.sh/wiki/%E8%AF%B4%E6%98%8E
- dns 接口详细说明 https://github.com/acmesh-official/acme.sh/wiki/dnsapi 这里一定要看,不同的域名服务商,命令也不同
1
2
3
4
5
6
7
8
9
#如 DNSPod.cn 用
export DP_Id="1234"
export DP_Key="sADDsdasdgdsf"
acme.sh --issue --dns dns_dp -d example.com -d www.example.com

#如 阿里云 用
export Ali_Key="sdfsdfsdfljlbjkljlkjsdfoiwje"
export Ali_Secret="jlsdflanljkljlfdsaklkjflsa"
acme.sh --issue --dns dns_ali -d example.com -d www.example.com
本文网址: https://pylist.com/topic/200.html 转摘请注明来源